Monday, 1 October 2012

Labeling A 2TB Hard Drive As "Personal Cloud Storage"

When you have a hard drive connected to your PC, that’s a local hard drive. It doesn’t matter if it’s internal or external connected via wire. It’s local. Not cloud. And if you decide to share that device out to the internet and access it that way, I’m sorry but I don’t qualify that as cloud storage.
Well, Western Digital would like you to believe otherwise with their My Book Live 2TB Personal Cloud Storage.
Now I suppose if you were to get really technical about it, sharing a media storage device with other computers on your local and/or wide (as in internet) network could be considered "cloud", but just barely.
But does this mean a LAN file server counts as a "personal cloud"? I have no idea.
I think this whole "cloud" labeling thing has gone a bit too far.
Also (and maybe this is just me), the My Book appears to have a creepy resemblance to a certain monolith.


Make sure to let me know in the comments below or over on our Facebook page
How you've got on and what you're planning to do next.

Ultimate Boot CD

Overview

Current release: 5.1.1
Ultimate Boot CD is completely free for the download, or could be obtained for a small fee. If you had somehow paid a ridiculous amount of money for it, you have most likely been fleeced. The least you could do is to make as many copies of the offical UBCD and pass it to your friends, relatives, colleagues or even complete strangers to minimize the per unit cost of your loss!

*For those of you interested in a Windows version of the Ultimate Boot CD, you might want to check out this project initiated by Ben Burrows.
*Please note that some of the freeware on UBCD explicitly prohibits redistribution for commercial purposes eg. DIMM_ID. If you intend to resell UBCD for commercial gains, please contact the respective authors for their permissions.
You need the Ultimate Boot CD if you want to:

  • Run floppy-based diagnostic tools from CDROM drives. More and more PCs are shipped without floppy drives these days, and it is such a royal pain when you need to run diagnostic tools on them.


  • Free yourself from the slow loading speed of the floppy drive. Even if you do have a floppy drive, it is still much much faster to run your diagnostic tools from the CDROM drive, rather than wait for the tool to load from the floppy drive.


  • Consolidate as many diagnostic tools as possible into one bootable CD. Wouldn't you like to avoid digging into the dusty box to look for the right floppy disk, but simply run them all from a single CD? Then the Ultimate Boot CD is for you!


  • Run Ultimate Boot CD from your USB memory stick. A script on the CD prepares your USB memory stick so that it can be used on newer machines that supports booting from USB devices. You can access the same tools as you would from the CD version.

  • New features in UBCD V5.x include:
    • New! The Linux-based distro Parted Magic is now included with UBCD V5.0. This should be the method of choice when you need to resize/rescue partitions, access NTFS filesystems or work with USB storage devices.


    • New! UBCD V5.x now supports both syslinux/isolinux and grub4dos. This helps improve the chances that UBCD will boot on any particular machine.

    When you boot up from the CD, a text-based menu will be displayed, and you will be able to select the tool you want to run. The selected tool actually boots off a virtual floppy disk created in memory.
    Tools currently included with the Ultimate Boot CD are:


    Make sure to let me know in the comments below or over on our Facebook page
    How you've got on and what you're planning to do next.
     
     
    Name of ToolVersionLicenseNotes
    BIOS
    !BIOS3.20Freeware 
    BIOS1.35.0FreewareWebsite says V1.35.1, but program displays V1.35.0.
    CMOSPWD5.0GPL 
    KEYDiskn/aGPL 
    WipeCMOS1.2Freeware 
    CPU
    CPU Burn-in1.00FreewareThe Linux version which is included in UBCD is at V1.00. V1.01 applies to Windows only.
    CPUinfon/aGPL 
    Intel Processor Frequency ID (P3 and below)7.2Freeware 
    Intel Processor Identification Utility (P4 and above)4.32Freeware 
    Mersenne Prime Test24.14Public domain 
    Stress1.00GPL 
    StressCPU (requires CPU with SSE)2.0Freeware 
    x86test0.10aGPL 
    Boot Management
    Boot Partition2.60Freeware 
    boot.kernel.org (BKO)n/aFreeware 
    EditBINI1.01.1Freeware 
    GAG (Graphical Boot Manager)4.10GPL 
    Gujin2.8.4GPL 
    MBRtool2.3.200Freeware 
    MBRWork1.08Freeware 
    netboot.men/aFreeware 
    PLoP Boot Manager5.0.12Free for personal use 
    Smart BootManager3.7.1GPL 
    SPFDISK (Special FDISK)2000-03vFreeware 
    Super Grub Disk0.9799GPL 
    Super Grub2 Disk1.98s1GPL 
    XFDISK (Extended FDISK)0.9.3 betaFreeware 
    XOSL (Extended Operating System Loader)1.1.5GPL 
    Data Recovery
    Offline NT Password & Registry Editor110511n/a  
    PhotoRec6.12GPLIncluded in Parted Magic.
    TestDisk6.12GPLIncluded in Parted Magic.
    Hard Disk Information & Management
    AMSET (Maxtor)4.00Freeware 
    ATAINF1.3Freeware 
    ATA Password Tool1.1Freeware 
    Change Definition Utility (for Fujitsu M16xx/M2915 HDDs)n/aFreeware 
    DiskCheck4.0.6Freeware 
    DISKINFO1.02Freeware 
    ESFeat (ExcelStor)2.30Freeware 
    Feature Tool (IBM/Hitachi)2.15Freeware 
    GSmartControl0.8.6GPLIncluded in Parted Magic.
    SMARTUDM2.00Freeware 
    UATA100 (Seagate)3.06Freeware 
    UDMA Utility (for Fujitsu MPD/MPE/MPF series HDDs)n/aFreeware 
    UDMA Utility (for Fujitsu MPG series HDDs)n/aFreeware 
    Ultra ATA Manager (Western Digital)June, 2003Freeware 
    WDIDLE3 (Western Digital)1.05Freeware 
    Hard Disk Diagnosis
    ATA Diagnostic Tool (Fujitsu)7.0Freeware 
    DLG Diagnostic (Western Digital)5.19Freeware 
    DLG Diagnostic (Western Digital)4.15FreewareV5.x has been reported not to work on some older machines, so V4.15 has been included as a backup.
    Drive Fitness Test (IBM/Hitachi)4.16Freeware 
    ES-Tool (Samsung)3.01vFreeware 
    ESTest (ExcelStor)4.50Freeware 
    GWSCAN (Gateway)3.15FreewareFor IDE hard drives 10GB or smaller.
    GWSCAN (Gateway)5.12FreewareFor IDE hard drives larger than 10GB.
    HDAT24.5.3Freeware 
    HDAT24.8.1Freeware 
    HUTIL (Samsung)1.21FreewareFrom soeren: "HUTIL 2.00 lacks the possibility to view the SMART values and it appears to be a lot slower than 1.21. It's only needed for the newest Samsung drives, the "older" ones still work with 1.21."
    HUTIL (Samsung)2.10Freeware 
    MHDD324.5Freeware 
    MHDD324.6Freeware 
    PowerMax (Maxtor/Quantum)4.09Freeware 
    PowerMax (Maxtor/Quantum)4.23Freeware 
    SCSIMax (Maxtor/Quantum)1.21Freeware 
    SeaTools for DOS (Seagate/Maxtor)2.23Freeware 
    SeaTools for DOS (Seagate/Maxtor)1.10Freeware 
    SHDIAG (Samsung)1.25Freeware 
    ViVARD0.4FreewareThe official website is down. Various third party websites claim to have V1.0, but is actually V0.4.
    Hard Disk Cloning
    CopyWipe1.14Freeware 
    EaseUs Disk Copy2.3.1Freeware 
    g4u2.4BSD 
    HDClone (Free Edition)4.0.6Freeware 
    partimage0.6.9GPLIncluded in Parted Magic.
    Partition Saving3.90Freeware 
    PC INSPECTOR clone-maxx1.0Freeware 
    Hard Disk Low-Level Editing
    Disk Editor3.0Freeware 
    DISKMAN44.01Freeware 
    DiskSpy Free Edition (Personal use only)2.0Freeware 
    PTS DiskEditor1.04Freeware 
    Hard Disk Wiping
    Active@ KillDisk Free Edition4.1.2393FreewareFree Edition. Supports "One Pass Zeros" method only. Note that KillDisk V5.x is Windows only.
    CopyWipe1.14Freeware 
    Darik's Boot and Nuke2.2.6 BetaGPL 
    Fujitsu Erase Utility1.00Freeware 
    HDDErase4.0Freeware 
    HDShredder (Free Edition)3.8.1Freeware 
    MAXLLF (Maxtor)1.1Freeware 
    PC INSPECTOR e-maxx0.95FreewareActual version is 0.95 Build 775, but is referred to as 1.0 on product website.
    SUTIL (Samsung)1.01Freeware 
    Hard Disk Installation
    Data Lifeguard Tools (Western Digital)11.2Freeware 
    DiscWizard 2003 (Seagate)10.45.06Freeware 
    DiscWizard (Seagate/Maxtor)11.0.8326FreewareMaxBlast V5.0 is essentially the same thing i.e. OEM version of Acronis TrueImage. Startup Recovery Manager not included. Didn't see much use for it on the bootable CD, plus it can be activated in the Win32 program itself if required, or you can copy over the "Recovery Manager" folder youself.
    Disk Manager (IBM)9.57Freeware 
    Disk Manager (Samsung)10.42Freeware 
    MaxBlast (Maxtor)4.0Freeware 
    Partition Management
    Cute Partition Manager0.9.8Freeware 
    Dsrfix3.12Freeware 
    FIPS2.0GPL 
    Free FDISK1.3.1GPL 
    GParted0.8.1GPLIncluded in Parted Magic.
    Partinfo1.11Freeware 
    Partition Resizer1.3.4Freeware 
    Partition Saving3.90Freeware 
    PTDD Super Fdisk1.0Freeware 
    Ranish Partition Manager2.40FreewareUsing stable version because V2.44 is beta and reported to be buggy.
    SPFDISK (Special FDISK)2000-03vFreeware 
    XFDISK (Extended FDISK)0.9.3 betaFreeware 
    Memory
    AleGr MEMTEST2.00Free for personal use 
    DIMM_ID3.57GPL 
    Memtest864.0GPL 
    Memtest863.5bGPL 
    Memtest86+4.20GPL 
    TestMemIVn/aFreeware 
    Windows Memory Diagnosticn/aUBCD Only 
    Others
    FileLink3.01FreewareThis program is part of Caldera OpenDOS V7.03.
    Kon-Boot1.0Free for personal use 
    Parted Magic6.6GPLFull list of programs can be found here
    UBCD FreeDOSR1.44n/a Based on NwDsk V3.40.
    Peripherals
    ATAPI CDROM Identification2.22Freeware 
    CD Index1.1Freeware 
    CHZ Monitor-Test2.0Freeware 
    Parallel Port Information System1.45Freeware 
    Video Memory Stress Test1.7GPL 
    System
    AIDA162.14n/a Discontinued
    ASTRA (Demo version)5.5014-day Demo 
    Hardware Detection Tool0.5.0GPL 
    HWiNFO5.5.2Freeware 
    NSSI0.60.45Freeware 
    PC-Config9.33FreewareDiscontinued
    PCI1.1Freewarepcidevs.txt: 22-01-2008
    PCISniffer1.5Freeware 
    System Speed Test 324.78Freeware

    Copy An Entire Website To Your Hard Drive

    Have you ever wanted to copy an entire web site (not just the current page) to your hard drive for true offline browsing? If so, then check out the free program, HTTrack Website Copier.
    Rather than try to explain it myself, HTTrack gives a great explanation of what it does and how it works:
    It allows you to download a World Wide Web site from the Internet to a local directory, building recursively all directories, getting HTML, images, and other files from the server to your computer. HTTrack arranges the original site’s relative link-structure. Simply open a page of the “mirrored” website in your browser, and you can browse the site from link to link, as if you were viewing it online. HTTrack can also update an existing mirrored site, and resume interrupted downloads. HTTrack is fully configurable, and has an integrated help system.
    I have personally used this program many times and it works great.
    Please use this program responsibly though. You shouldn’t “copy” a web site every day or during peak usage times… doing so may get you banned by the web site admin.


    Make sure to let me know in the comments below or over on our Facebook page
    How you've got on and what you're planning to do next.

    Easily Maintain A Mirrored Directory Structure

    At work, I have a network location set up and have pointed each user’s ‘My Documents’ folder to a folder with their name on this server. The benefit to this is I can backup just a single location nightly and it includes each user’s documents in the backup automatically. Of course, users love to put virtually everything on their desktop which, obviously, does not get included in my nightly backup.
    To remedy this, I have created a Robocopy command which mirrors the user’s desktop to a folder on the server:
    robocopy “source_directory” “destination_directory” /V /S /E /COPY:DAT /PURGE /MIR /NP /R:10 /W:30
    The source is the desktop folder and the destination is folder on the server. The great thing about this command is that the file/folder structure is mirrored every time the command runs. So if the user deletes/renames files, the server location is updated appropriately. Nifty.
    I have this command scheduled to run on each user’s computer at 11:30 every night, which gives the task plenty of time to complete the sync before the server backup starts.


    Make sure to let me know in the comments below or over on our Facebook page
    How you've got on and what you're planning to do next.

    Easily Cycle Through Folder Names, Command Line Tip

    Personally, I am a big fan of the command line. From it I can get to just about everything I need pretty fast and I have an extensive set of utilities available at my disposal. One of the things, however, that isn’t so quick is navigating to different directories. If they have long names you have to type them exactly or they won’t take.
    If this sounds familiar, here is a quick tip: pressing the TAB key will cycle through all the directory names in your current directory. For example, if you go to the command line and type “cd ” and then the tab key repeatedly, you will see the directory names are dropped in.
    This shortcut can be an good time and keystroke saver, especially if you are navigating through the Windows or Program Files directory.

    Forbidden Windows Folder Names

    FYI for you today. Windows has reserved names which it will not let you assign to folders. Try naming a folder to one of the following:
    con
    com0 (through) com9
    lpt0 (through) lpt9
    Attempting to do so automatically reverts the folder back to its original name

    Unshare Your Windows 7 User Folder

    On most Windows Vista and Windows 7 PCs, the current-user-logged-in user folder is usually automatically shared over the local network. Some people don’t like this and don’t want the user folder shared out at all. This is an easy fix once you know how to do it. See video below for instructions

    Vedio link for method

    How To List All Your Windows 7 Shared Folders

    In Windows it’s a little too easy to lose track of all the folder shares you create. However there’s a utility in Windows 7 that will list all your shares in just a few clicks. See video below to see how it’s done.


    Shared Folders

    All of your Shares Listing

    If you every have wanted to view all of your shares for whatever reason, but have had a hard time finding them, Windows 2000 and XP include a nice feature to view all shares. To do this, go to Start -> Control Panel -> Administrative Tools -> Computer Management. Then, click on “Shared Folders,” and finally click on “Shares.” Here you will see all of your computer’s active shares, including the administrative ones. However, you CANNOT delete the administrative shares (they are easy to spot because they always have a dollar sign trailing their names). For all non-administrative shares, you can use this console to manage, create, edit, and delete existing shares.

    Some Network Storage

    All of us have important data on our PCs, some more important than others. Backing up that data is important, and we at PC Mechanic have pounded home that concept time and time again in past tips, newsletters and on the website. But, many backup methods require you to actually remember to do it. Therein lies the problem.
    If you are on a network, and these days an increasing number of us are even in our homes, then you have other options besides recording DVDs and CDs. You can hook up a network storage device to your home network. Basically, this acts as an external hard drive on your network, accessible by all PCs on the network. And being that it resides separately from your actual PC, it provides data redundancy. It can also help you synch data among all PCs on your network, seeing as the data is stored on one central point on the network.
    I have been doing some personal research into this for my own office, and I thought I would point out just a few options I have come across:
    • Mirra Personal Server. Basically, this is a small stand-alone Linux powered PC that sits on your network and transparently archives data from your PC. It provides secure web access to the system when you are away.
    • Buffalo Linkstation. Same concept as Mirra, basically. It also doubles as a print server.
    • LinkSys EFG120
    Good luck with your own research.

    Creating Hidden Windows Shares

    If you are a network or system administrator who frequently sets up network shares, however you do not want them to be visible by browsing the network, make the share hidden. This is very easily done:
    1. Right click on the shared, or folder to share, and select Properties.
    2. Select the Sharing tab.
    3. For the share name, add a “$” to the end of the share name field.
    4. Apply your changes.
    By adding the “$” to the end, you are telling Windows to share the folder, but do not advertise that it is shared. You can now access the share by going to:
    \\[computer name]\[shared folder name]$
    The folder will open right up even though it is invisible to the end user simply browsing the network.

    Do Your Network Folder Sharing Quickly and Easily

    If you only want to share a single folder on a network, you can just right click on it, go to “Sharing and Security”, and check the “Share this folder on the network box”. If you want to share numerous folders and set them up easily, do as follows:
    1.) Go to “StartRun” and in the command prompt, enter “shrpubw.exe”. Hit enter.
    2.) When the new Window pops up, hit “Next”.
    3.) Now you will be given many options as to how you want your folder set up. Go through all of the options and choose the settings you want.
    Do this for all of the folders you want to share and you will be done in no time!

    Sharing a Modem Over a Network

    Dial-Up Sharing

    It is rather easy to share a dial-up connection in Windows 9x or 2000/XP. For 9x users, enable Internet Connection Sharing on the PC connected to the Internet. For 2000/XP users, simply go to the properties dialogue for your Internet Connection in “My Network Places” and enable Sharing.

    Broadband Sharing

    Surely you’ve heard of a router before, right? Routers are devices which route many connections into one “pipe.” For sharing Internet connections, routers can give many computers access to the Internet, indirectly, through the router. In this setup, a router (sometimes combined with a switch) is connected directly to the cable or DSL modem. The network is directly connected to the router, and thus the router acts as an “Internet Sharing” computer. Routers range in price from nearly nothing (on eBay) to thousands of dollars, but for home users, Netgear’s 4-Port Internet Ready Router/Gateway/Switch or Linksys’s BESRF41 Router are both excellent sub-$50 choices.

    How to Set up Network Sharing in Windows 7

    Just a quick post for you guys today. We’re going to look at how to set up network sharing in Windows 7- it’s a pretty simple process, once you’ve got it figured out, but getting everything set up can sometimes be a headache, just the same. So, let’s say you want to share files between two computers on a network- maybe copy a few over from one to the other. Here’s how.

    The Initial Setup

    Once you’ve got all your systems connected to a local network, it’s time to create a home group. It’s pretty simple to do. Navigate to your Control Panel, then click on Network and Sharing Center. Once you’re there, you should see the “Create a Home Group” option, assuming you aren’t already in one.  Follow the prompts to set one up- it’s not too difficult. Once you’ve done that, you’ll need to have each other computer on the network manually join the homegroup.
    If you’ve any systems in the network that aren’t running Windows 7, things get a little bit more complicated- but more on that in a moment.

    Changing Advanced Settings

    In the Windows 7 Network and Sharing Center, click on “Advanced Options.” Make sure Network discovery and File and Printer Sharing are both turned on. If you want all your shared files in a central location, you can always turn on Public Folder Sharing- though you could easily create a sharing folder elsewhere.
    Finally, unless you foresee people you don’t actually know breaking into your home network, I’d turn off password protected sharing. It doesn’t do much other than complicate things, truth be told. If you’re setting up a work or public profile, however, leave it on- and only share the password and username with people you trust.

    Networking with Older Versions of Windows

    It’s actually pretty easy sharing files and folders with older Windows PCs.  The first thing you need to do is make sure all the machines are members of the same work group. You can check whether or not this is the case by right clicking on “My Computer” and selecting “properties.”  The default work group is simply “Workgroup.”
    Ensure that you’ve got all your shared files and folders set up, and that your printer is set to be shared on your network (under “devices and settings, right click on your printer and select “properties,” then click “share this printer.”
    Next up, it’s just a simple matter of noting the path of your printer, and adding it as a device on the other machines. The rest should take care of itself, as file sharing is concerned

    How To Network Older Windows To Windows 7

    Question:
    How can I move/remove data/pictures/emails from a WinMe PC to a Win 7 PC using either a wired network, USB or Ethernet cable? I have been unable to network the WinMe to the Win7 PC,


    This is a bit of an odd one, because what Kenny is attempting to do is connect an MS-DOS based Windows (WinME was the final Windows using MS-DOS as the actual OS) over the network to a Windows 7 machine.
    First I’ll list the easy way, then the hard way.
    In all honesty, the easiest thing to do here is sneakernet it, as in buy a USB flash drive in 8GB flavor, copy all the files to be moved off the ME computer to it, then take that stick to the Win7 box and copy them there.
    What Windows Vista and 7 introduced was a higher-security method of networking. If going from a Vista/7 box to another Vista/7 box, the higher security allows both computers to connect easily. However if connecting an edition of WinXP or lower to Win7, you will have to “degrade” the security in order to make network sharing connections work on a LAN, as in lower the network encryption to 40/56 bit. And you may possibly have to make like-to-like usernameson both computers.
    This web page explains how to connect a Win98 box (very similar to ME) to Win7 for network sharing. You’ll notice that there is not simply one solution, so I can’t say “Do A, then B then C and it will work”. When you’re trying to troubleshoot network problems from a 10+ year old DOS-based Windows to Win7, the standard mechanic’s answer applies here. “Could be anything.”
    It’s not that you can’t get shared folders working in older-to-newer Windows, but if trying to get files off a PC running WinME, which is guaranteed to be a crusty old computer box, the sneakernet method will get the job done much quicker and with far more stability.
    The stability I’m referring to is the fact that DOS-based network file transfers are not exactly stable at times. Anyone who has ever transferred a large amount of data from a DOS computer box over a LAN knows exactly what I’m talking about. Files are copied but you have no idea whether what arrived on the other side kept the file integrity in check or got completely “chewed up” during the transfer.
    Win2000, WinXP and so on are “true” Windows as they have no MS-DOS network weirdness going on. When in the DOS world however, you’re pressing your luck.
    At least when you use a USB stick, copy files there and unmount it properly, you know the files held their integrity when transferred from HDD to USB.
    On a final note, I do not recommend connecting a USB stick larger than 8GB to an MS-DOS based Windows like ’98 or ME. While true there is no limitation to how large of a storage capacity either of those environments will recognize for flash drives (seriously, Win98 will recognize a 16GB stick as long as the file system is FAT or FAT32), you run the risk BSODs when using them in DOS-based Windows. Remember, in 2000 at the time WinME was released, the average hard drive size in most computers was less than 10GB (usually way less). While WinME works with USB 2.0 sticks without any problems at all, remember that at the core you are dealing with DOS in that environment. Treat it as such.

    Speed Up Your Broadband

    If you are using Windows XP Professional, you can perform a little tweak to speed up your broadband connection:
    1. Click Start, Run.
    2. Type “GPedit.msc”.
    3. Expand the “local computer policy” branch.
    4. Expand the “administrative templates” branch.
    5. Expand the “network branch”.
    6. Highlight the “QoS Packet Scheduler” in the left window.
    7. In the right window, double-click “limit reservable bandwidth”.
    8. On the setting tab, check “enabled”.
    9. Change the “Bandwidth limit %” to zero.
    10. Close the window and reboot.

    How To Stop People From Freeloading Your Broadband

    It is now much more common than not to have a wireless network in your home. Many broadband ISPs are actually bundling routers with their service that acts as a wireless access point. That means that, chances are, you and many of your neighbors are using wireless.
    So, pop open your laptop computer and have it look for available wireless networks. Do you see a few that are not your’s? In most cases, you will. If any of those networks are not secured, that means you can connect to your neighbor’s network and freeload on their Internet connection.
    And if you can see them, chances are they can see you.

    How Do You Know?

    How would you know if somebody is freeloading on you? Well, it isn’t hard to tell.
    1. Many wireless routers provide a way to view existing connections. Sometimes called a “LAN Client List”.
    2. You can run the Windows command line utility NETSTAT to view all incoming connections.
    3. The easiest way would be to use a utility like Network Magic. It has the ability to graphically show you all devices connected to your network. You can try it for free for 7 days – enough to see what’s going on.

    Should You Stop It?

    OK, so if you’ve determined you are inadvertently allowing your home to act as a public wifi hotspot, you have the choice to leave it running or turn it off.
    Some people don’t mind allowing others to use their broadband? Some people choose to follow the altruistic approach and just allow it. After all, chances are we’ve all been on the other end before and found ourselves temporarily using somebody else’s connection.
    If you don’t have any file sharing enabled and use a firewall on your computer, then most likely you’re OK allowing others to freeload on your network. However, I would never say you are totally safe. There are hackers out there who can break through almost anything. Now, what are the chances that you have skilled hackers in your neighborhood? Well, I’ll leave that one to you.
    The most secure option, though, is not to allow anybody to freeload on you.

    How To Stop Freeloading

    Here are the basic steps you need to take to kick off the freeloaders:
    1. Turn off SSID broadcasting. The SSID is a short string which identifies your network. When you detect wireless networks and few a list of those available, that list is showing the SSIDs of those networks. Your wireless router has an option to stop broadcasting that SSID. What this means is that you, of course, still have an SSID, but that it is not actively displaying it to anybody looking for a wifi hotspot.
    2. Change your SSID. It is always a good idea, aside from turning off broadcasting, to change your SSID from the factory default. The most famous example of this is Linksys routers coming with the “linksys” SSID by default. A walk in a neighborhood with a wifi detector can sometimes show you several “linksys” networks.
    3. Use MAC Address Filters. Every computer on your network has it’s own MAC address, and it is possible to configure your router to only allow connections from specific MAC addresses. To get your MAC address in Windows, run “ipconfig” via the command line and look for the physical address. Mac users can find this information under “System Preferences” in the “Network” section. Using MAC filtering is not fool proof because it is possible to spoof a MAC address. But, for the most part, it will take care of the problem because chances are your neighbors don’t know how to spoof a MAC address.
    4. Use encryption. Turn on your wireless encryption on your router (WEP or WPA) and set a password. This will force anybody connecting to the network to enter a password.
    Using these basic wireless security settings, you can keep your neighbors from stealing your bandwidth.

    Get rid of Unwanted Network Neighbors

    Many times when you browser over to My Network Places and view your network neighborhood, you get hung up by the long list of network nodes. It can slow things up quite a bit. However, these nodes are simply folder shortcuts and can therefore be deleted safely. So, to delete the ones you don’t want, first right-click on it and choose Properties. Verify that the Type field says “Folder Shortcut”. If it does, it is safe to delete it. You can still get to it if you want by going to the Entire Network node. If you access on of them, Windows will re-create the shortcut automatically. But, until then, you don’t need to list it and slow things down

    Network Magic

    I’ve never taken a formal class on the finer points of networking, but I have managed to learn enough to set up a home network. But it was not the easiest process, and I’m sure I’m not the only one who has encountered difficulty with this project. So when I found a program that promised to act as a central point to setup, manage and even fix my network, I thought I would check it out. So this week, I’ll be sharing with you: Network Magic v4.0
    Installation is very quick, due to minimal options. Just agree to the license, choose a program folder, and the files are copied. Finishing will automatically launch the application and its wizard. Note that Network Magic will add two desktop icons, a system tray icon and an entry in the Start Menu.
    The wizard will guide you through monitoring, connecting, sharing files and protecting your network. The first step lets you know that NM will need internet access to send anonymous statistics to and receive updates from the website, so any firewall you may have might flag it. A link to the privacy policy is supplied, should that interest you. I had no problems with NM and Windows Firewall. NM will then detect your router and ask for your router’s username and password. I did not feel comfortable giving these to a new program, but thankfully you can skip this step, so I did. Then you can name your PC for identification on the network. If a network already exists, your PC’s name will be filled in already. Changing the name for the program will not change it for Windows, so feel free to call each PC anything you like. Next, it will tell you about the differences between the Premium (which you receive for 30 days) and the Free version; mainly file and printer sharing. Keep in mind that Network Magic cannot prevent Windows from controlling these options, only the free version program from using them. So do not worry about updating Network Magic to Premium just to keep printing over a network. Finally, you need an e-mail address, but the message is nothing important, so feel free to use a junk e-mail account. Be sure to set one up with a free web mail provider if you haven’t already for just this sort of situation.


    While the convenient in-program file sharing expires in the free version, the other features still make Network Magic on a compelling package for anyone new to networking. By breaking down your devices and helping fix problems, Network Magic can save a networking novice from the complexity and confusion that networking can bring on. Check it out on www.networkmagic.com

    Old Printer Tips: Convert, Network-Enable or Go Wireless

    If you’ve been using computers a long while you probably have an old printer lying around somewhere. And it’s most likely true the only reason you don’t use it is either because:
    1. It’s too big to fit on the desk.
    2. It uses an insanely thick cable with a Centronics connector to connect to your computer.
    3. Your computer (especially if a laptop) doesn’t have the port where that insanely thick cable is supposed to plug into.
    Assuming you can acquire a printer ribbon (if dot matrix) or replacement toner (if laser) for it, you can resurrect that printer using modern tech.
    Converting Centronics to USB: Only takes a single cable to do this. And being the printer is old it’s more or less guaranteed to be recognized by your computer without the need to install any drivers whatsoever.
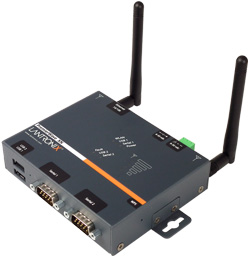
    Connect printer directly to the router: Requires a miniature print server. This connects via Ethernet directly to the router and network-enables the printer. No connection to the computer required (but some setup does need to take place.)
    Connect printer over Bluetooth wireless: Requires an (expensive) adapter. Also may require another (not-so-expensive) USB Bluetooth adapter if your PC isn’t Bluetooth-enabled. The adapter mentioned for the printer does Centronics and USB! Wireless range is stated to be 100 meters (328 feet) but in practical application you’re “safe” with about 25 meters (82 feet) at the most. Works well in most instances. The best part is that you can have the printer in a completely separate room – leaving you more desk space.

    Some quick truths about older printers

    Dot matrix printers while loud and have a slow PPM (page per minute) speed have two distinct advantages.
    1. Tractor feed paper, if available, is dirt cheap.
    2. You can easily go for an entire year without having to change the printer ribbon.
    Older business-grade HP LaserJet printers also have a slow PPM but have the following advantages.
    1. New toner, shockingly, is sometimes cheaper than inkjet replacement cartridges.
    2. Toner lasts far longer than inkjet cartridges do.
    3. Biz-grade LaserJets can be easily serviced. Chances are high that there’s a local certified HP tech close to where you live – and he does house calls.
    4. Older LaserJets require no stupid proprietary drivers because support is built-in to the OS. Windows, Mac and Linux will “see” these printers with no fuss, no muss

    Set up multiple printer drivers

    As we all know, printers are quite affordable these days, but they absolutely kill you and beat you silly when it comes to the ink for that printer. A way to save money on ink is to print in black only. Blank ink is cheaper than colored. When you print something, you can always go into your printer driver settings and set it to gray-scale or black-only, but you can save time by simply setting up another instance of your printer drivers with the black-only setting permanently on. Simply install a separate instance of your printer drivers – one for black and one for color. Then, when you need to print something, you can either make your desired printer default and print, or you can simply choose which “printer” you wish to print with. Note that you can also do this for other settings as well. This will save you a little time, and a little money

    Set A PDF Printer As Your Default

    Many of you probably have a PDF printer installed on your machine (if not, you should get a free one such as CutePDF or PDF Creator). If so, set it to your default if it is not already.
    The reason is simple: if you accidentally print something to a paper printer you waste the paper and ink it comes out on. On the other hand, if you accidentally print something to PDF, no harm.
    Unless you do an unusually large amount of printing, you probably will not even notice the difference.

    Adding a TCP/IP Printer

    If you have a network printer or a printer connected to a print server appliance such as an HP JetDirect, you will need to connect to that printer via TCP/IP. To do so, go to Control Panel -> Printers and Faxes. Click File -> Add Printer and press next. Choose “A local printer attached to this
    computer” and uncheck the box below it. When the next screen comes up, choose the radio button for “Create a New Port” and then select “Standard TCP/IP port.” A new wizard will appear so click next. Type in the IP address of the printer in the top field, and press next. If everything went right, you should have a new port. Sometimes, Windows has a tough time detecting the printer, and you have to configure the settings manually. If all else fails, keep clicking next. Eventually you should be lead back to the original screen that you were at, and you should choose “Use the following port” this time, selecting the TCP/IP port that you just created. Finally, run through the rest of the dialogue (drivers and such) as you would do for any printer. Note that some printers require that you connect to them on a special TCP/IP port number, and that must be manually configured.

    How To Share a Printer on Network

    What’s a network without a printer? Sharing your printer
    among the network computers is a simple process. Follow these steps:
    1. The first thing you must do is tell Windows 95 to redirect
      printing from the LPT1 port to the network queue. To do so, double-click the Printer’s
      icon in Control Panel and then double-click the Add Printers icon.
    2. Windows 95 will open Add Printer Wizard, click the Next
      button
    3. Select the Network Printer radio button, and then click
      Next again.
    4. The Add Printer Wizard will ask you to provide the path to
      the network printer. Enter it in the format: \\computer name\share name where computername
      is the name of the computer to which the printer is physically attached, and sharename is
      the share name that you’ve assigned to the printer.
    5. The Add Printer Wizard also asks if you print from
      MS-DOS-based programs. Click the YES radio button, and then click the Next button.
    6. In the Add Printer Wizard’s next dialog box, select the
      type of printer you’re trying to capture by selecting the printer’s manufacturer from the
      Manufacturer’s list and choosing the printer model from the Printer’s list.
    7. Click the Next button to continue.
    8. At this point, the Add Printer Wizard will ask you to
      assign a name to the printer. This name isn’t the same as the printer’s share name.
      Instead, it’s the name that your local PC will use, and it will appear under the printer’s
      icon (title) and in any Select Printer windows.
    When it finishes copying the printer drivers to your hard
    drive, it will create an icon for the printer. You can now print to the printer in exactly
    the same way that you would if it were physically attached to your PC